Experts, engineers, and manufacturers seek precise measurement systems for the inspection of products. Sub-millimeter accuracy, fast measurement speed, and ease of use are among the significant factors to be considered.
The following case shows us how a manufacturer chooses a handheld 3D scanner that meets their specific needs and what benefits the 3D scanner KSCAN-Magic brings to the company.
Measure a Welded Coupling for Quality Control
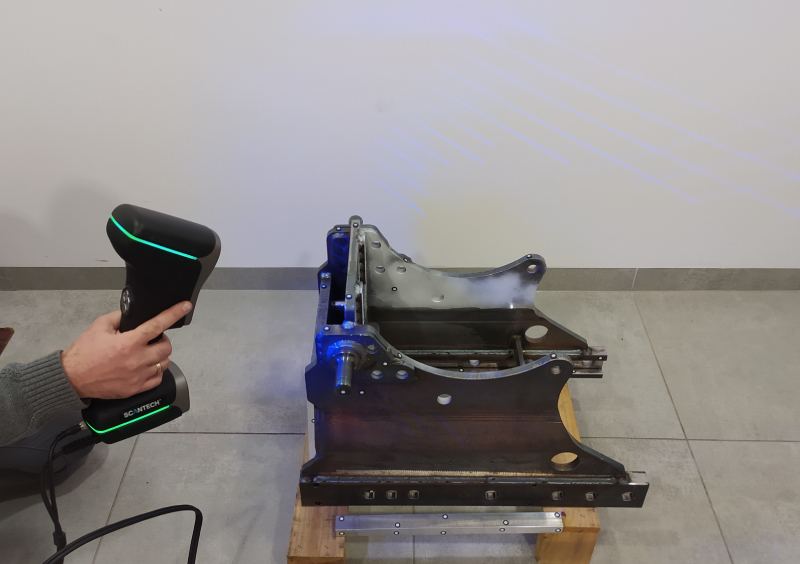
The customer is looking for 3D solutions to conduct precise and efficient 3D measurements for quality control and reverse engineering. The parts they manufacture are mainly machined and welded parts. In this case, the object to be scanned is a CNC machined and welded steel coupling for a tractor. This around 500-mm coupling part features rough surfaces, some of which are polished.

Requirements of the Project
The customer aims to 3D scan the whole part to get full-field data and compare it with the original CAD to identify deviations. This way, the manufacturer can ensure the product is qualified and ready for shipping to its final customers. Therefore, the customer needs a 3D scanner that can capture the whole data of the parts efficiently.
Besides, the portability of the measurement tool is among the top priorities. They need a lightweight and compact 3D scanner that can be easily carried around. An easy-to-use 3D scanner is preferable to reduce the cycle time so that its employees can use it after a short amount of training.
The measurement process needs to be as fast as possible so that engineers can fulfill the inspection tasks efficiently.
Why 3D Scanner KSCAN-Magic
After searching for several mainstream 3D scanners in the market, the customer reached for INVIZION, a reseller of Scantech for help. They used the handheld 3D laser scanner KSCAN-Magic to scan the part, which features a large scanning field to speed up their measurement process. The 6-mm magnetic targets were used to reduce the time for preparation, which means less amount of these targets can fulfill the task. The preparation and scanning took about 6 minutes.
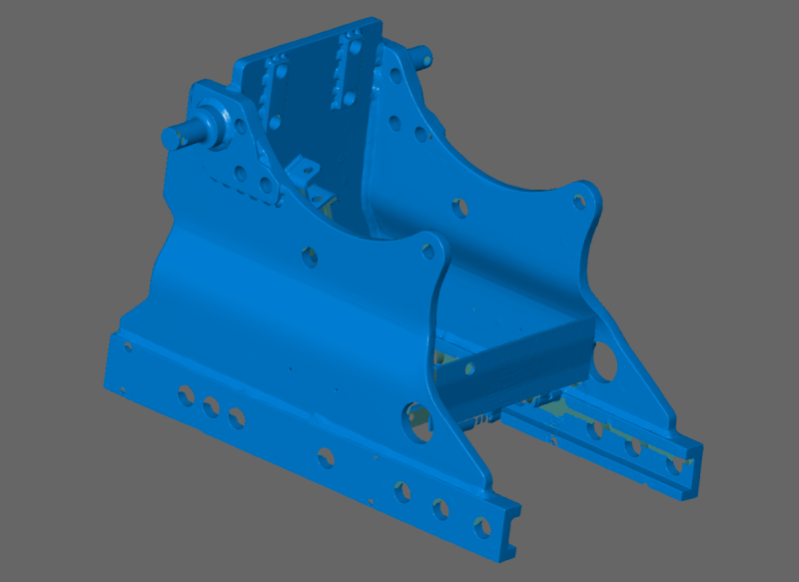
The engineer obtained full-filed scan data of the part, shown below.

Thanks to KSCAN-Magic’s measurement rate of up to 1.65 million MPS and accuracy of up to 0.020 mm, the engineer captured the data with vivid details quickly. The picture below shows that the edges of the numbers are smooth and clear. The point clouds obtained were precise and can be used for further inspections.

After exporting high-quality STL data, they compared the part with its original CAD model and identified several key dimensions.
Benefits of Using KSCAN-Magic
Infrared and Blue Laser Scanning
One of the most innovative features of the KSCAN-Magic 3D laser scanner is that it combines infrared and blue lasers into one device. It provides a wide range of scanning modes: large-area scanning, fast scanning, fine scanning, deep-hole scanning, and built-in photogrammetry. A pair of high-definition industrial cameras on it allows for meticulous 3D scanning.
Large Scanning Area & Fast Measurement
KSCAN-Magic’s ultimate scanning area reaches 1440 mm x 860 mm, achieving precise 3D measurement with ease. This 3D scanner delivers an ultra-fast scanning rate of up to 1.65 million measurements per second.
Click the links below to learn more.
3D inspection
https://www.3d-scantech.com/3d-inspection-of-large-scale-casting/

